How to Clean a Solenoid Valve
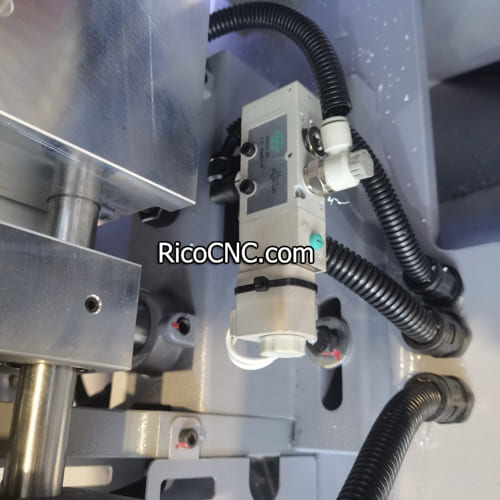
Solenoid valves are crucial components in many fluid control systems, ranging from automotive and HVAC to complex industrial automation systems. Over time, these valves can accumulate dust, debris, and other contaminants, which may impair their performance or cause them to stop functioning altogether. Knowing how to clean a solenoid valve effectively can extend its lifespan and ensure that your systems operate smoothly. This article will guide you step-by-step through the process of cleaning a solenoid valve.
Why Should You Clean a Solenoid Valve?
Cleaning a solenoid valve is essential for maintaining its efficiency and prolonging its lifespan. Debris and buildup can cause several issues, including:
Obstructed Flow: Dirt and particles can clog the orifice and ports, preventing fluid flow.
Valve Failing to Open or Close: Blockages or residues on the plunger or seal can prevent proper valve movement.
Increased Wear: Contaminants may accelerate wear on the valve’s internal components, reducing its overall lifespan.
Keeping solenoid valves clean is not just about preventing operational issues—it also ensures the safety of the entire system, especially in industrial settings where malfunctioning valves can lead to significant disruptions.
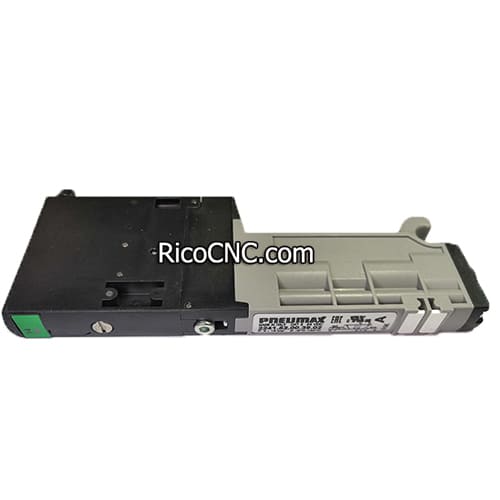
For an example of a solenoid valve that requires regular maintenance, consider the 2241.52.00.39.02 Pneumax Pneumatic Solenoid Valve.
Tools and Materials Required for Cleaning
To clean a solenoid valve properly, you will need some basic tools and cleaning supplies. Here’s what you’ll need:
Screwdrivers and Wrenches: To disassemble the valve.
Compressed Air: To blow out any dust or particles from the valve components.
Cleaning Solution: Mild detergent or an approved solvent for cleaning metal parts.
Soft Brush: To scrub off any debris without scratching delicate surfaces.
Clean Cloth: To wipe down components after cleaning.
Safety Tip
Before beginning any cleaning or disassembly of the solenoid valve, make sure to turn off the power and relieve all system pressure to avoid injury or damage to equipment.
Step-by-Step Guide to Cleaning a Solenoid Valve
Step 1: Disconnect the Valve from Power and Fluid Source
Turn Off Power: Ensure that the solenoid valve is de-energized. Disconnect the valve from its electrical power supply.
Relieve Pressure: Relieve any fluid pressure in the system by closing off inlet and outlet lines. This is essential to avoid accidents or damage during disassembly.
Disconnecting the valve properly ensures that you can safely move on to the cleaning process without any pressure build-up or risk of electric shock.
Step 2: Disassemble the Solenoid Valve
Remove the Coil: Use a screwdriver to carefully remove the solenoid coil from the valve. Be cautious to avoid damaging any electrical components.
Detach the Plunger and Spring: Once the coil is removed, you can access the plunger and spring. Carefully pull them out of the valve body.
Check for Wear: Inspect the plunger, spring, and seals for signs of wear or damage. Replace any components that appear to be compromised.
Step 3: Clean the Valve Body and Components
Clean the Valve Body: Use a soft brush and cleaning solution to scrub the valve body gently. Make sure to remove any built-up residue or grime.
Use Compressed Air: After brushing, use compressed air to blow out any dust or particles lodged in the valve body or orifices. Be thorough, as even small debris can interfere with valve function.
Clean the Plunger and Spring: Wipe down the plunger and spring with a clean cloth. Ensure that no debris remains on these moving parts, as they must be able to move freely within the valve body.
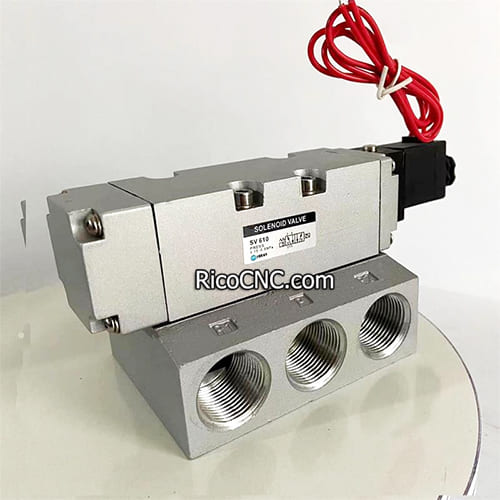
For more detailed information on solenoid valves such as the SV610 SYM Solenoid Valve, which requires similar maintenance, you can visit the product page here: SV610 SYM Solenoid Valve.
Step 4: Inspect and Replace Worn Parts
While cleaning, it’s an excellent opportunity to inspect each part for wear and tear.
Seals: Check the seals and O-rings for any signs of deterioration. If they are cracked or worn, replace them immediately.
Plunger and Spring: Inspect these parts for signs of corrosion or damage. Replace if necessary to ensure the valve operates smoothly.
Replacing worn parts during routine maintenance can prevent breakdowns and extend the lifespan of the solenoid valve.
Step 5: Reassemble the Valve
Reattach the Plunger and Spring: Place the plunger and spring back inside the valve body.
Attach the Coil: Reinstall the solenoid coil, ensuring that all electrical connections are secure and that the coil is properly seated.
Reconnect to System: Once fully assembled, reconnect the solenoid valve to the piping and electrical supply.
After reassembling, make sure everything is secure and in place before moving to the next step.
Step 6: Test the Valve
Apply Power: Energize the valve and observe its operation. The valve should open and close smoothly without hesitation.
Check for Leaks: Inspect all connections and seals for any signs of leaks.
Observe Performance: Operate the valve under normal working conditions to ensure it functions correctly.
Testing the solenoid valve after cleaning ensures that it is functioning optimally and helps to verify that there are no issues from reassembly.
Maintenance Tips for Solenoid Valves
1. Regular Cleaning Schedule
To prevent issues, establish a regular cleaning schedule for your solenoid valves. This is especially important in environments where the fluid may contain contaminants.
2. Proper Filtration
Use filters to minimize the amount of debris entering the valve. Installing a filtration system upstream of the valve can significantly reduce the need for frequent cleaning.
3. Monitor Electrical Supply
Ensure that the solenoid valve receives the correct voltage to prevent coil burnout, which can lead to failure.
Internal Links for Further Information
If you’re looking for more information on solenoid valves and their maintenance, you may find these resources helpful:
Learn more about pneumatic valves in automation with Aventics Solenoid Valve Pneumatic Pilot Valves.
Check out our range of Aventics Pneumatic Solenoid Valve Series ED02 for high-quality solutions in fluid control systems.
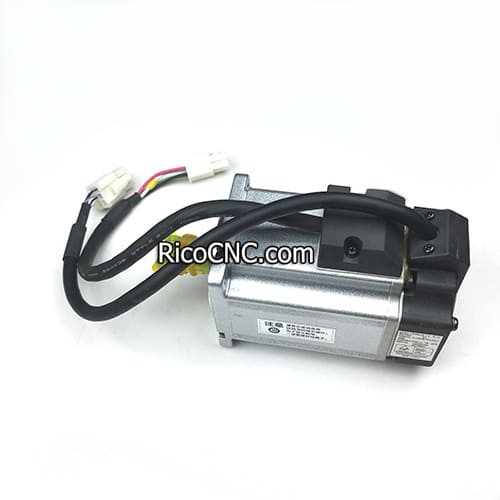
For a broader selection of servo motors suitable for automated systems, see the MSMD042P1U Panasonic AC Servo Motor.
Frequently Asked Questions About Cleaning Solenoid Valves
1. How often should I clean a solenoid valve?
The frequency of cleaning depends on the environment and the type of fluid. For most applications, cleaning once every 6-12 months is sufficient, but in dirty or contaminated environments, more frequent cleaning may be needed.
2. Can I use any cleaning solution on solenoid valves?
No, it’s important to use a mild cleaning solution that is compatible with the materials of the valve. Avoid strong acids or bases that could corrode metal parts.
3. What should I do if my solenoid valve still doesn’t work after cleaning?
If the solenoid valve doesn’t function after cleaning, check for worn components such as the coil, plunger, or seals. You may need to replace faulty parts.
4. Is it necessary to disassemble the valve completely for cleaning?
Yes, disassembling the valve allows for thorough cleaning of all parts, ensuring there is no debris that could cause further issues.
Conclusion
Cleaning a solenoid valve is a straightforward but essential maintenance task that helps to ensure your fluid control systems operate efficiently. By following this guide, you can troubleshoot common issues, perform routine cleanings, and replace any worn parts as needed. This proactive approach not only extends the life of the solenoid valve but also minimizes downtime and reduces overall maintenance costs.
If you need any additional help or are looking to replace solenoid valve components, don’t hesitate to get in touch with us. Our wide range of solenoid valves and other automation products are designed to meet diverse industrial needs.


